
 Pin it
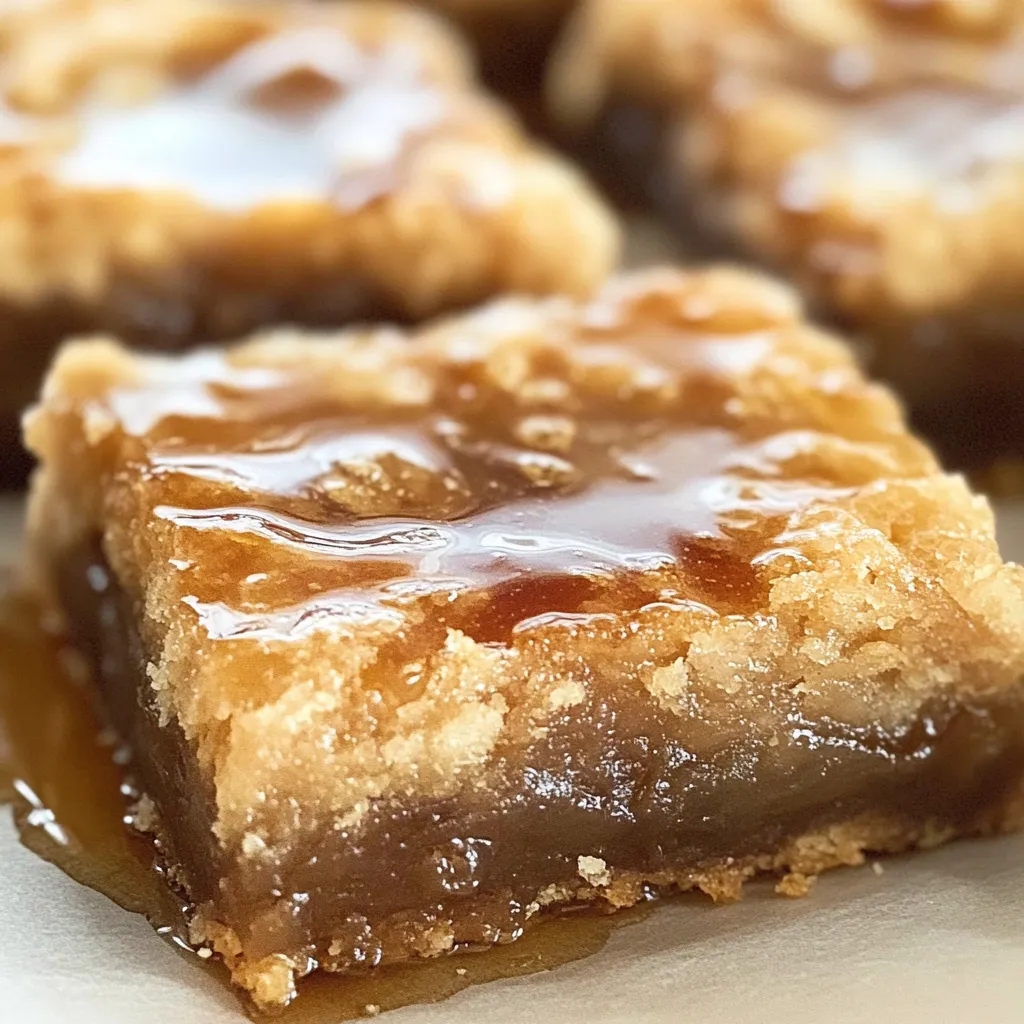
This square twist on the classic Canadian butter tart packs all that maple goodness into an easy-to-grab bar form. The sweet maple topping paired with the buttery bottom layer makes a treat that brings back fond memories while feeling totally fancy. Ever since I moved up north, I've been bringing these to family get-togethers, and they're always the first dessert to vanish from the spread.
These treats have become my go-to for community gatherings. The first time I showed up with a batch at a block party, I hadn't even unpacked my container before people started asking how to make them. These days I always fix two batches because they don't stick around long.
Ingredients
- Salted butter: You'll need half a cup, nice and soft, to create that shortbread-style base. Let it sit out until you can easily press it with your finger.
- Brown sugar: Brings that warm, molasses hint that works so well with maple. Go for the dark stuff if you want bolder flavor.
- All-purpose flour: Forms the foundation of your bar. Scoop it into your measuring cup with a spoon for the right amount.
- Maple syrup: This is what it's all about. Don't grab pancake syrup—get the real deal. The darker varieties pack more maple punch.
- Brown sugar: Teams up with maple syrup to make that gooey, irresistible filling.
- Walnuts: Give your bars that needed crunch factor. Pop them in the oven for a few minutes first to wake up their flavor.
- Salted butter: Makes the filling extra lush and cuts through sweetness. Set it out early to soften.
- Eggs: They're what helps your filling set up right. Take them out of the fridge ahead of time.
- All-purpose flour: Just a bit thickens your filling to that perfect gooey-but-set texture.
- Salt: Brings all the other tastes to life. Don't skip it, even with the salted butter already in there.
Step-by-Step Instructions
- Fix the Bottom Layer:
- Mix your soft butter and brown sugar till they're well combined. Slowly add flour, stirring until you get something that looks like wet sand but sticks together when you grab some. Pack it down firmly into your greased baking dish, making sure to get the corners good. Bake at 350°F for 10 minutes flat—you want it set but not brown yet.
- Cook Up the Maple Mixture:
- Grab a pot and throw in your maple syrup, brown sugar, and chopped walnuts over medium heat. Keep stirring until it bubbles up completely. Turn the heat down right away so it doesn't burn, and let it cook gently for 5 minutes, giving it a stir now and then. You'll notice it getting a bit thicker and smelling amazing. Take it off the heat and stir in your butter until it melts away completely.
- Mix in Your Eggs:
- In another bowl, beat your eggs with the flour and salt until there aren't any lumps left. Keep stirring your maple mix while slowly pouring in the egg mixture in a thin stream. Stir like crazy so the eggs don't cook in chunks. Keep mixing until everything looks the same throughout.
- Finish Baking:
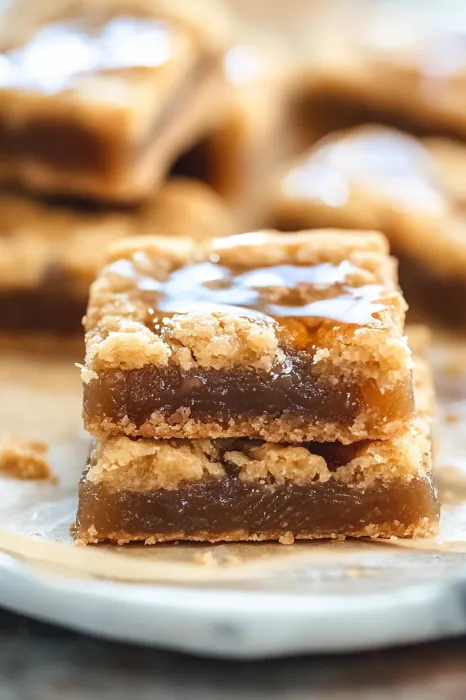
- Pour that warm filling over your partly baked bottom layer, spreading it out to all edges. Put it back in the oven for 25 to 30 minutes. Give the pan a gentle shake—the middle should wiggle a little bit. The edges will look set, but the center needs to stay slightly soft. Let it cool completely on a wire rack before you try cutting it.
 Pin it
The maple syrup really makes this whole thing sing. I learned how important quality is when someone gave me fancy small-batch syrup from Vermont as a present. It took these bars from yummy to mind-blowing. My grandma always told me maple syrup was worth its weight in gold, and every time I make this recipe, I see exactly what she meant.
Keeping Them Fresh
These maple treats stay good on your counter for up to 3 days if you keep them in a sealed container with parchment between the layers. If you need them to last longer, stick them in the fridge for up to a week. They get a bit firmer when cold, so I like to let them warm up to room temp before eating for the best texture.
Different Ways to Make Them
The original recipe tastes amazing, but I've come up with some tasty twists in my kitchen. For deeper flavor, try adding a teaspoon of vanilla or a tablespoon of bourbon to your filling. Pecans work great instead of walnuts, especially if you toast them first. During the holidays, I sometimes mix in ¼ teaspoon of cinnamon and a tiny bit of nutmeg to the filling for a festive touch.
How to Enjoy Them
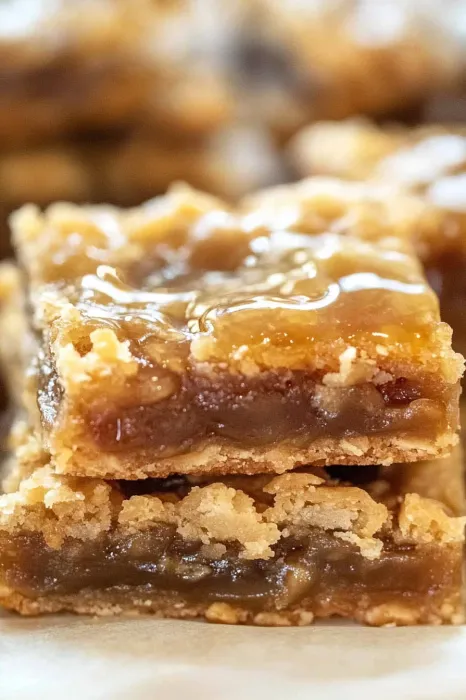
These bars taste best at room temperature with a spoonful of whipped cream or a small scoop of vanilla ice cream on top. For an extra special treat, pour a little warm maple syrup over them just before eating. They go really well with coffee or tea, particularly ones with caramel or vanilla flavors. When I'm serving them to guests, I sometimes sprinkle a tiny bit of flaky sea salt on top to make the maple flavor pop even more.
 Pin it
The Canadian Connection
These maple bars showcase one of Canada's most famous food treasures. Native peoples were making maple syrup long before they taught European settlers how to tap trees. Many Canadian families still run their own maple operations and throw parties during syrup season. This treat carries on that tradition while turning it into an easy-to-share dessert that brings a taste of Canadian sweetness to any table.
Frequently Asked Questions
- → Can I swap walnuts for another nut?
Absolutely! Try pecans, almonds, or any nut you like to give it a personal twist.
- → What’s the best way to store these?
Keep them in a sealed container at room temperature for 3 days or in the fridge for up to a week.
- → Can these be made ahead?
Yes! Make them the day before so the flavors get even better by the next day.
- → Will a different pan size work?
Using a 9x9 pan is fine! The bars will turn out thinner, and you might need to adjust the bake time.
- → Any egg-free alternatives?
Egg replacements like flaxseed meal or commercial substitutes can work, but the bars may feel slightly different.