
 Pin it
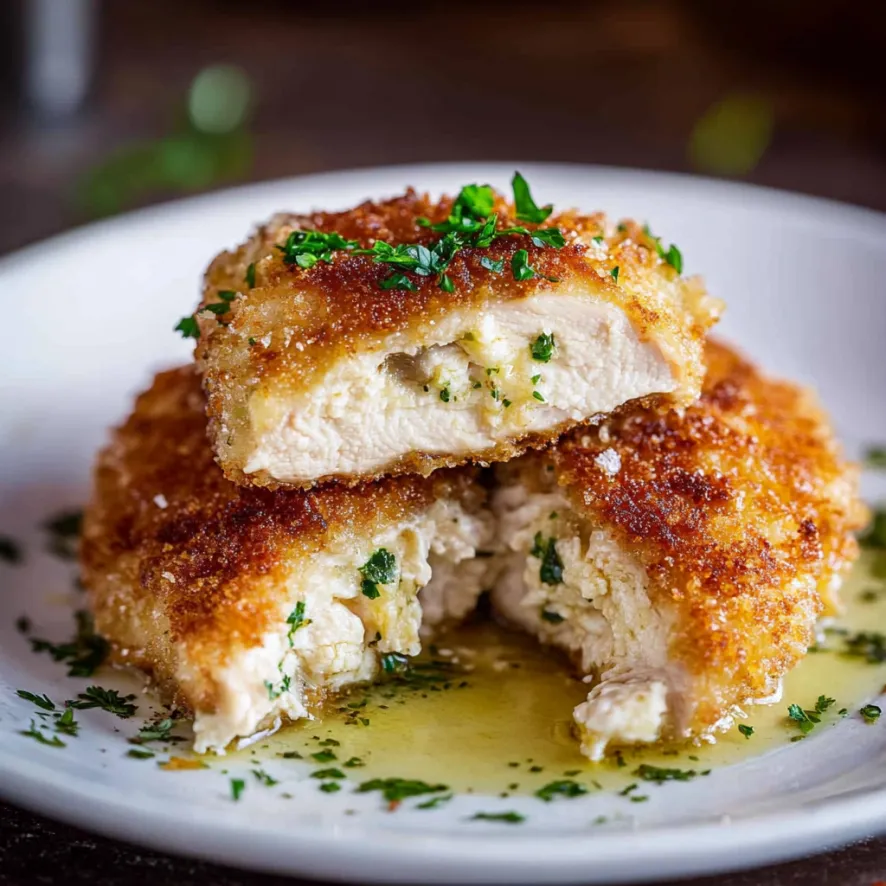
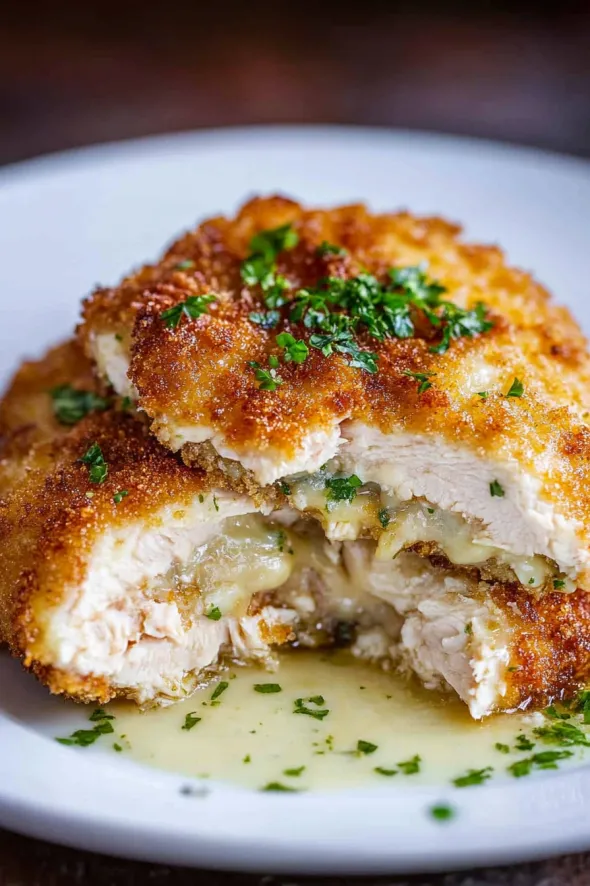
Chicken Kiev transforms simple chicken breasts into an elegant masterpiece with its crunchy exterior and molten herb-garlic butter center. This modernized version simplifies the traditional Eastern European recipe without sacrificing any of the decadence that made it famous. Gone are the days of pounding, rolling, and deep frying—this streamlined method creates the same spectacular butter explosion with significantly less effort. With perfectly crisp Panko coating and juicy chicken surrounding a pool of flavorful butter, this dish brings restaurant-quality presentation to your dining table with surprisingly straightforward preparation. The moment your knife breaks through the golden crust releasing that aromatic butter is pure culinary theater worth mastering.
I first attempted Chicken Kiev decades ago for my husband's birthday, following a complicated recipe that took hours of preparation. While delicious, it remained a once-yearly indulgence due to the intensive process. When I discovered this simplified method, I skeptically tried it alongside my traditional version for comparison. My husband took one bite of this easier version and declared it superior to my labor-intensive original. Now Chicken Kiev appears regularly on our table, and I no longer dread the preparation. The greatest testament to this recipe's success is my mother-in-law requesting it whenever she visits—something I never thought possible with my previous method.
Essential Ingredients
- Chicken breasts (three 12-ounce): Forms the foundation of this dish. Select larger, evenly sized breasts for easier pocket creation and consistent cooking.
- Unsalted butter (6 tablespoons): Creates the magical molten center that defines Chicken Kiev. Room temperature butter incorporates flavors more effectively than cold butter.
- Fresh garlic (3 cloves): Provides aromatic pungency that permeates the chicken. Freshly minced garlic delivers significantly more flavor than pre-minced varieties.
- Fresh parsley (2 tablespoons): Adds bright color and herbaceous notes that balance the rich butter. Flat-leaf Italian parsley offers more robust flavor than curly varieties.
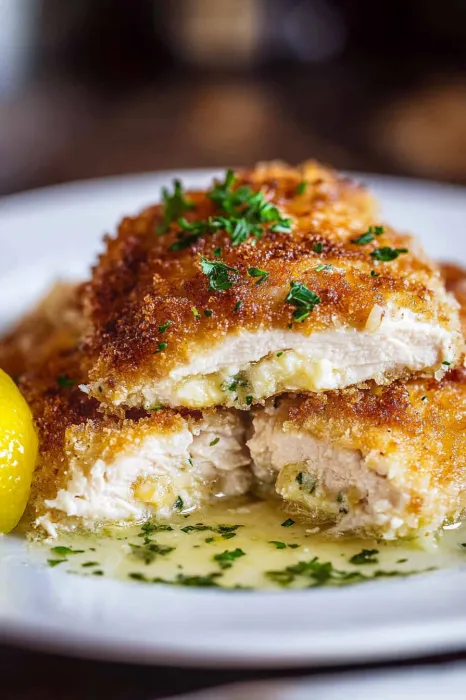
- Lemon juice (1 tablespoon): Cuts through richness with essential acidity. Fresh-squeezed provides cleaner flavor than bottled alternatives.
- Panko breadcrumbs (1 cup): Creates superior crunch compared to regular breadcrumbs. Their larger, airier structure develops exceptional texture when fried.
- All-purpose flour (½ cup): Forms the first layer of breading that helps egg adhere properly. Measured accurately to prevent excess coating.
- Eggs (2 large): Provides crucial moisture that activates breading adhesion. Room temperature eggs create more even coating.
- Neutral cooking oil (approximately 1 cup): Allows proper frying without imparting competing flavors. Light olive oil or canola oil withstands frying temperatures without smoking.
Perfect Preparation
- Create flavorful butter mixture:
- Combine room temperature butter with minced garlic, finely chopped parsley, fresh lemon juice, salt, and pepper in a medium bowl. Use a fork to thoroughly incorporate all ingredients until evenly distributed throughout the butter. This compound butter becomes the star of the dish, so ensure garlic and herbs are finely minced for optimal flavor dispersion.
- Prepare chicken strategically:
- Position chicken breasts on cutting board with smooth side up. Using a sharp utility knife, slice horizontally through the thickest part of each breast, stopping before cutting completely through to create a pocket. The incision should extend as widely as possible within the breast without breaking through the sides or back. This precise cut creates maximum space for butter while maintaining structural integrity.
- Fill with butter carefully:
- Spoon compound butter mixture into each chicken pocket, distributing evenly between all pieces. Press gently on the chicken surface to spread butter throughout the pocket without forcing it through the edges. Pinch edges of chicken together where possible to seal the pocket. Season exterior surfaces with salt and pepper to enhance flavor development during cooking.
- Bread properly:
- Create a three-station breading setup with flour, beaten eggs, and Panko breadcrumbs in separate shallow dishes. Working with one piece at a time, dredge chicken completely in flour, shaking off excess. Dip into beaten eggs, allowing excess to drip off, then press firmly into Panko breadcrumbs, ensuring complete coverage. The sequential application creates layers that prevent butter from escaping during cooking.
- Fry to golden perfection:
- Heat oil to precisely 350-375°F in a large, heavy skillet. The proper temperature ensures immediate crust formation that seals in butter. Add breaded chicken without crowding the pan, cooking approximately 4 minutes per side until deeply golden brown. The chicken should sizzle immediately upon contact with oil but not smoke or burn. Remove to paper towel-lined plate to absorb excess oil before serving immediately.
 Pin it
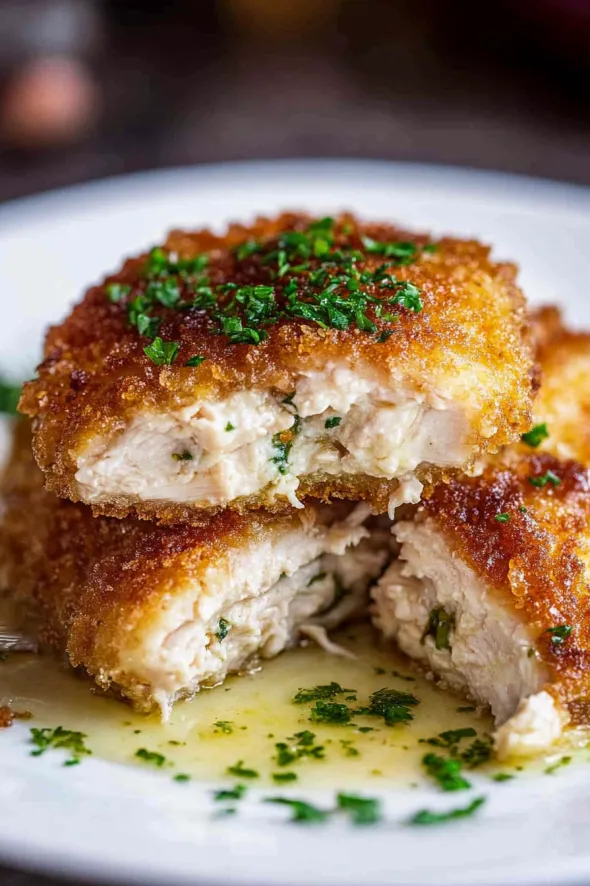
My daughter accidentally discovered a brilliant modification to this recipe when helping in the kitchen. Her small hands struggled with stuffing the butter mixture into the chicken pockets, so she flattened it between parchment paper into thin squares, froze them briefly, then slid these butter pats into the chicken pockets. This technique created perfectly distributed butter throughout the chicken rather than a single pool in the center. Now our entire family uses her method, which ensures every bite contains that wonderful herb-butter flavor rather than saving it all for the middle.
Troubleshooting Guide
Butter leakage during cooking typically indicates breading or temperature issues. Ensure chicken pockets are properly sealed and completely coated in breading with no bare spots. If butter still escapes, your oil temperature may be too low—use a thermometer to verify 350-375°F before adding chicken. Lower temperatures prevent proper crust formation that seals butter inside. Additionally, refrigerating breaded chicken for 15-30 minutes before frying helps set the coating for better sealing.
Proper doneness requires attention to both exterior and interior. Chicken that appears golden outside but remains undercooked inside often results from frying at too high a temperature. Reduce heat slightly and extend cooking time by 1-2 minutes per side. For absolute certainty, use an instant-read thermometer inserted into the thickest part of chicken (not the butter pocket) to verify 165°F internal temperature without overcooking and drying out the meat.
Achieving perfect crispness depends on proper oil management. If breading becomes soggy rather than crisp, your oil may be contaminated with excess flour or breadcrumbs. Use fresh oil for each batch and maintain proper temperature throughout cooking. Never overcrowd the pan, which causes temperature drops that prevent proper crust formation. For extra insurance, place finished chicken on a wire rack rather than paper towels after frying to prevent steam from softening the bottom crust.
 Pin it
Serving Suggestions
Create elegant dinner presentation by slicing chicken on a slight diagonal just before serving to reveal the butter center dramatically flowing onto the plate. Place chicken against a mound of creamy mashed potatoes that capture the escaping butter sauce. Add bright green vegetables like asparagus or haricots verts for color contrast and textural balance. This arrangement showcases both the technical achievement and flavor harmony of the dish.
Balance flavors with complementary sides that enhance without competing. Lemon-herb rice pilaf echoes the butter flavors while absorbing excess sauce. Simple roasted vegetables seasoned only with salt and pepper allow the chicken to remain the flavor focus. A crisp green salad with light vinaigrette provides refreshing contrast to the richness of the main dish, cleansing the palate between bites.
Elevate everyday dining with thoughtful accompaniments. Warm crusty bread served alongside captures any escaped butter for delightful dipping. A simple cucumber and tomato salad dressed with vinegar provides acidic balance to the rich chicken. For casual elegance, serve alongside crispy roasted potatoes seasoned with the same herbs used in the butter mixture to create flavor continuity throughout the meal.
Creative Variations
International flavor adaptations maintain the concept while exploring new taste profiles. Mediterranean version incorporates feta cheese and sun-dried tomatoes into the butter mixture. Mexican-inspired adaptation uses cilantro, lime, and a touch of minced jalapeño in place of traditional herbs. Asian fusion version combines butter with lemongrass, ginger, and a touch of miso for unexpected complexity. Each variation maintains the essential butter explosion while creating entirely new flavor experiences.
Dietary accommodations allow everyone to enjoy this special dish. Gluten-free adaptation substitutes gluten-free panko and flour blend for standard breading ingredients. Dairy-sensitive version replaces butter with dairy-free buttery spread enhanced with additional herbs to compensate for flavor differences. Lower-fat adaptation reduces butter quantity while adding moisture with puréed roasted garlic or olive tapenade, maintaining flavor intensity with less fat.
Seasonal inspirations keep this classic fresh throughout the year. Spring variation incorporates fresh dill and chives into the butter mixture. Summer adaptation adds basil and lemon zest for brightness. Autumn version features sage and browned butter notes. Winter comfort variation includes roasted garlic and thyme with a touch of truffle oil for special occasions. These seasonal adaptations maintain the essential technique while highlighting the best flavors of each season.
Storage Strategies
Prepare components ahead by mixing compound butter up to three days before cooking. Shape butter into small logs using plastic wrap, refrigerate until firm, then slice into portions just before stuffing chicken. This advance preparation significantly reduces day-of cooking time while allowing flavors to develop more fully within the butter mixture.
 Pin it
Store leftover cooked chicken properly by cooling completely then refrigerating in airtight container for up to three days. The butter will solidify, changing the texture somewhat but maintaining flavor. For best results when reheating, allow chicken to come to room temperature for 20 minutes before gently warming in 325°F oven until heated through. Microwave reheating is not recommended as it creates uneven heating and toughens the chicken.
Freeze uncooked prepared chicken by completing all steps through breading, then place on parchment-lined baking sheet and freeze until solid. Transfer frozen breaded chicken to airtight container or freezer bags and store up to one month. Thaw overnight in refrigerator before frying according to recipe instructions, adding 1-2 additional minutes per side to ensure proper cooking of the chilled chicken.
This simplified Chicken Kiev represents everything wonderful about modernizing classic recipes. The traditional version, while impressive, required technical skill and time commitment that kept many home cooks from attempting it. This streamlined method delivers identical flavor and presentation—that magical moment when golden chicken releases a stream of aromatic butter—while remaining accessible to everyday cooks. After years of making both versions, I've found this simplified approach not only saves time but actually improves consistency of results. The expression on dinner guests' faces when they cut into perfectly crisp chicken and witness that butter explosion makes every minute of preparation worthwhile, confirming that sometimes the best cooking is about creating memorable food moments rather than just delivering nutrition.
Frequently Asked Questions
- → Can I bake Chicken Kiev instead of frying it?
- Yes! Preheat your oven to 400°F and place the breaded chicken on a baking sheet. Spray or drizzle with oil and bake for 25-30 minutes until golden and the internal temperature reaches 165°F.
- → How do I know if my Chicken Kiev is cooked through?
- The most reliable way is to use an instant-read thermometer - it should read 165°F at the thickest part (be careful to measure the chicken, not the butter pocket).
- → Can I prepare Chicken Kiev in advance?
- Yes! You can prepare and bread the chicken up to 24 hours ahead. Keep it covered in the refrigerator until ready to cook. You can also freeze the breaded uncooked chicken for up to 3 months.
- → Why is my butter leaking out during cooking?
- This can happen if the pocket isn't sealed well or if the chicken is cooked at too high a temperature. Make sure to pinch the opening closed and secure it with toothpicks if needed, and maintain a medium heat when cooking.
- → What sides go well with Chicken Kiev?
- Classic sides include mashed potatoes, steamed vegetables, rice pilaf, or a crisp green salad. The escaping butter sauce is particularly delicious over mashed potatoes or rice.