
 Pin it
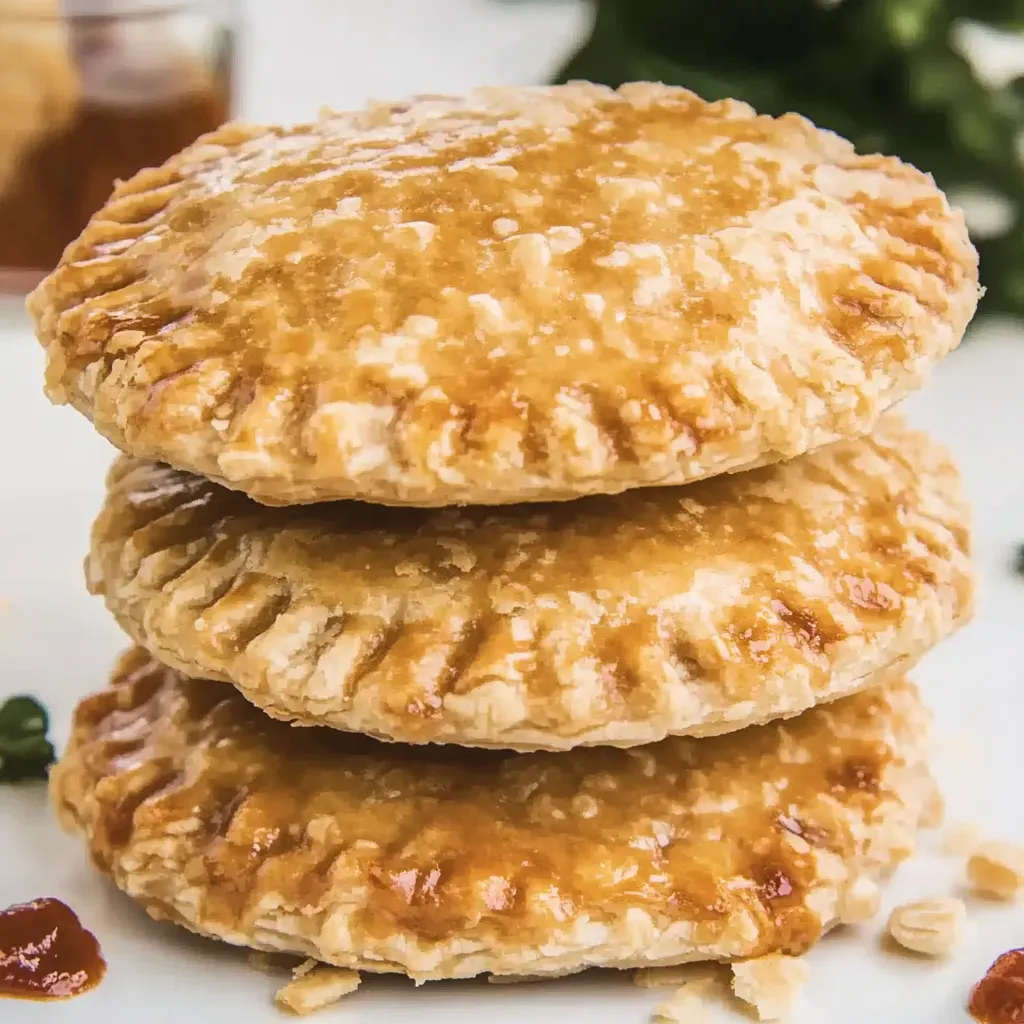
Flaky golden pastry encasing warm spiced apple filling creates handheld dessert perfection without deep frying. These air fryer apple hand pies deliver all the nostalgic comfort of traditional apple pie with added convenience and significantly less guilt. Each bite offers the perfect balance of buttery crust and sweet apple filling enhanced with aromatic cinnamon and nutmeg. The quick cooking method seals in the flavors while creating irresistible texture contrast between the crisp exterior and tender, juicy center.
I discovered this recipe during a weekend experiment with my new air fryer, and these little pies have quickly become our family's favorite dessert request. My daughter who typically avoids most baked goods actually requested these for her birthday instead of cake, which speaks volumes about their universal appeal.
Essential Elements
Core Ingredients
- Refrigerated pie crusts: These provide the perfect flaky foundation without the time investment of homemade dough. Look for crusts with visible butter specks that indicate superior flavor development and flakiness potential in the finished product.
- Apple pie filling: The sweet, tender apple pieces suspended in thick, spiced sauce create that perfect nostalgic flavor. The precooked filling ensures proper texture within the short cooking time while providing consistent results every time.
- Cinnamon and nutmeg: These warming spices enhance the apple filling with aromatic depth. Fresh grated nutmeg offers significantly more complexity than pre ground, making even this small amount noticeably impactful.
- Vanilla extract: This ingredient bridges the fruit and spice flavors while adding subtle depth. Choose pure extract rather than imitation for clean, authentic flavor that elevates the entire filling.
- Egg wash mixture: The combination of egg and milk creates that beautiful golden sheen while helping seal the edges and adhere the coarse sugar topping. This crucial step transforms homemade pies into bakery quality treats.
Creation Method
Preparation Process
- Enhance Your Filling
- Begin by placing your apple pie filling in a medium bowl and gently cutting the larger apple pieces into smaller, more manageable bites using kitchen scissors. This ensures even distribution within each hand pie and prevents overstuffing. Add cinnamon, nutmeg, and vanilla extract to the filling, stirring gently to incorporate these warming spices without breaking down the apple pieces too much. This simple step transforms basic canned filling into something that tastes homemade.
- Prepare Your Crusts
- On a lightly floured surface, carefully unroll your refrigerated pie crusts and allow them to come to room temperature for about 15 minutes. This rest period relaxes the gluten and makes the dough more pliable. Using a 3 inch round cookie cutter, firmly press down and twist slightly to create clean edged circles. Gather and gently recombine scraps, rerolling once to create additional circles without overworking the dough which would compromise flakiness.
- Create Perfect Portions
- Place precisely one heaping tablespoon of your enhanced apple filling in the center of each bottom crust round, being careful to leave a half inch border around the edges. This measured approach ensures enough room to properly seal each pie while providing generous filling. Too much filling leads to leakage during cooking; too little creates disappointingly empty pockets within the finished pies.
- Ensure Proper Sealing
- Whisk together egg and milk to create a smooth wash, then brush this mixture around the perimeter of each filled dough circle. This critical step creates the adhesive that will permanently seal your pies. Place a second dough circle on top of each filled bottom, gently pressing out any air bubbles while bringing the edges together. Use the tines of a fork to firmly press around the entire circumference, creating both a decorative edge and a secure seal.
- Apply Finishing Touches
- Brush the assembled pies with additional egg wash, ensuring complete coverage across the top surface for even browning. Immediately sprinkle with coarse sugar which will adhere to the wash and create a beautiful sparkle and pleasant textural crunch. Using a sharp knife, cut small vents in the top of each pie which allows steam to escape during cooking, preventing filling eruptions and ensuring proper internal temperature.
- Transform Through Heat
- Lightly coat your air fryer basket with cooking spray before arranging the prepared pies in a single layer with slight space between each. Cook at 300°F for 10-12 minutes until the crusts develop a beautiful golden brown color. This lower temperature allows the crusts to cook through completely without burning while the filling heats to the perfect temperature. Work in batches if necessary rather than overcrowding, which would prevent proper air circulation.
- Create Complementary Glaze
- While the pies cook, whisk together powdered sugar with milk one tablespoon at a time until reaching the perfect drizzling consistency. This should be thick enough to hold its shape briefly when drizzled but thin enough to flow smoothly. Once the pies have cooled slightly, drizzle this simple glaze in a crosshatch pattern across the tops, allowing some to naturally drip down the sides for visual appeal.
- Exercise Serving Patience
- Allow the finished hand pies to rest for 3-5 minutes before serving. This brief cooling period allows the filling to set slightly while the pastry maintains its crispness. It also prevents burned mouths from molten filling while still delivering that perfect warm dessert experience. The contrast between the slightly cooled outer edges and warm center creates the ideal eating experience.
 Pin it
My mother always taught me that the smallest details make the biggest difference in baking. I discovered that cutting a few extra vents in the top of each pie allows for better steam release, preventing the dreaded filling explosion that can ruin the perfect presentation of these little treasures.
Serving Suggestions
Perfect Pairings
Elevate these handheld treats by considering thoughtful serving options. Create an interactive dessert bar by arranging warm hand pies alongside small bowls of caramel sauce, whipped cream, and cinnamon ice cream for personalized combinations. For breakfast or brunch service, pair with fresh fruit and yogurt for a balanced sweet start. When entertaining, place individual pies on small plates with vanilla bean ice cream and a light dusting of cinnamon for an elegant plated dessert that combines warm and cold elements beautifully.
 Pin it
Flavor Adventures
Creative Variations
This adaptable recipe welcomes personalization through simple ingredient swaps. Create mixed berry versions by substituting berry pie filling and adding lemon zest to brighten the flavors. Develop autumn inspired pies using pumpkin pie filling with extra cinnamon and a touch of clove. Chocolate lovers might appreciate banana filling with chocolate chips or Nutella swirled throughout. For adults only gatherings, add a teaspoon of bourbon or rum to the apple filling for sophisticated depth.
Storage Strategy
Maintaining Freshness
Protect your hand pies properly to enjoy their deliciousness beyond day one. Store completely cooled pies in airtight containers at room temperature for up to two days, separating layers with parchment paper to prevent sticking. For longer storage, refrigerate for up to four days, though the crust may soften slightly. Reheat refrigerated pies in the air fryer at 300°F for 2-3 minutes to restore crispness. For make ahead convenience, freeze assembled but uncooked pies on a baking sheet, then transfer to freezer bags for storage up to three months. Cook directly from frozen, adding 3-4 minutes to the cooking time.
 Pin it
I believe these little hand pies represent the perfect balance between nostalgic comfort and modern convenience. The tradition of apple pie connects us to generations of bakers before us, while the air fryer method acknowledges our busy modern lives without sacrificing quality. I find something deeply satisfying about creating individual desserts that deliver complete satisfaction in just a few perfect bites.
Frequently Asked Questions
- → Can I use different pie fillings?
- Absolutely! Cherry, blueberry, peach, or strawberry pie fillings all work great. Just make sure to cut any large fruit pieces smaller so they fit well in the hand pies.
- → Why do my hand pies burst open when cooking?
- This usually happens when the edges aren't sealed properly or there's too much filling. Make sure to use the egg wash around the edges, press firmly with a fork to seal, and don't overfill - about a tablespoon of filling is perfect.
- → Can I make these ahead of time?
- Yes! You can assemble the pies and refrigerate them for up to 24 hours before cooking. You can also freeze the assembled, uncooked pies for up to 3 months - just add 2-3 minutes to the cooking time.
- → How should I store leftover hand pies?
- Store cooled pies in an airtight container at room temperature for 2 days, or in the refrigerator for up to 4 days. Reheat in the air fryer at 300°F for 3-4 minutes to crisp them back up.
- → Can I make these without an air fryer?
- Definitely! Bake them in a regular oven at 350°F for about 15-18 minutes or until golden brown. You can also fry them in oil for an even flakier crust.