
 Pin it
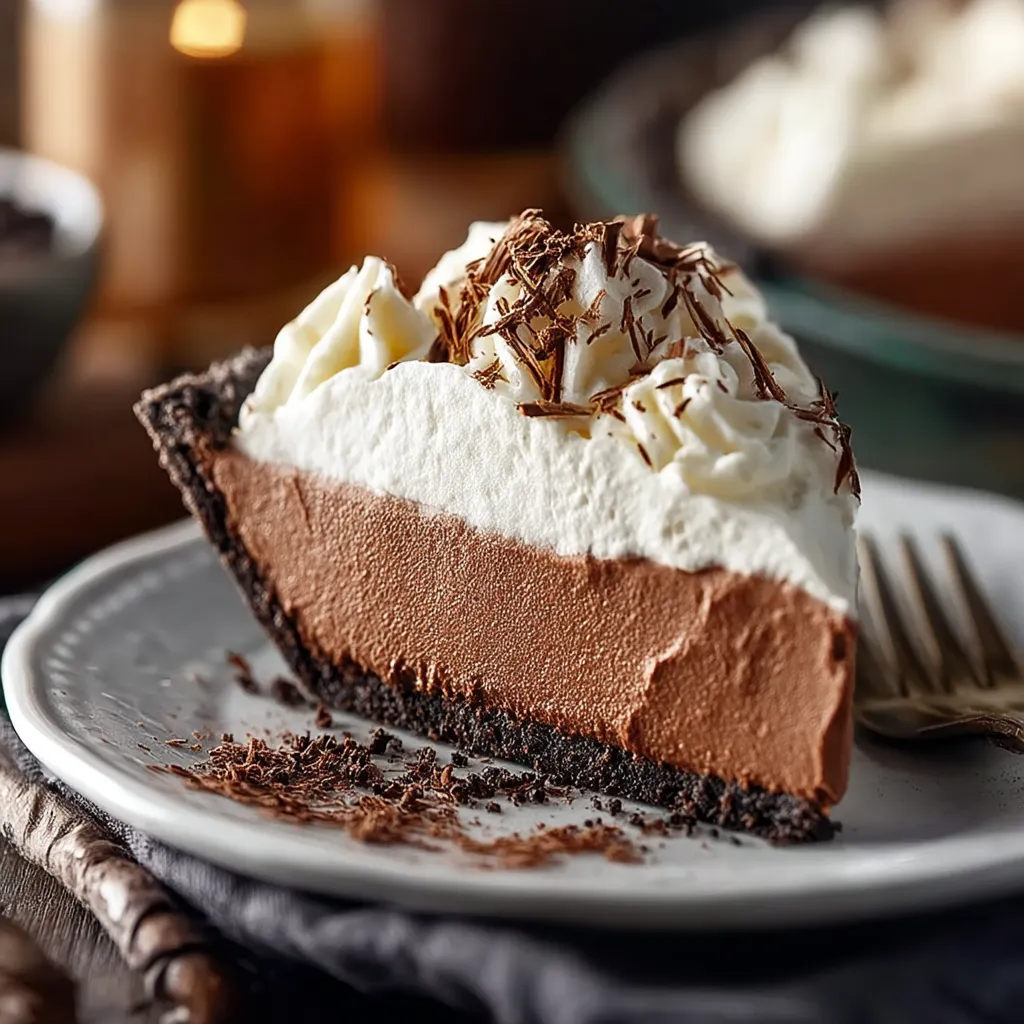
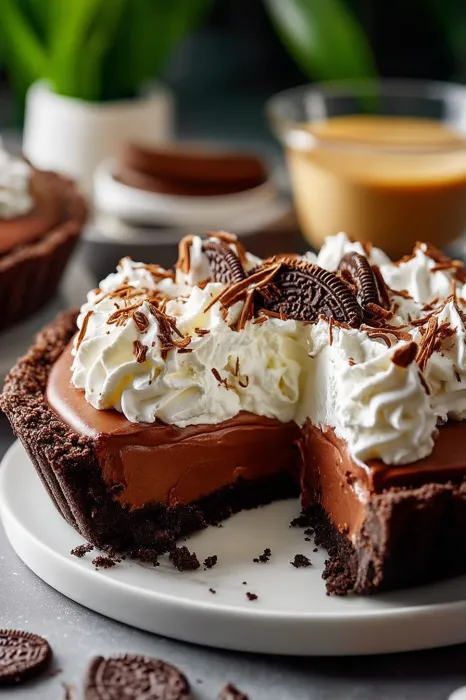
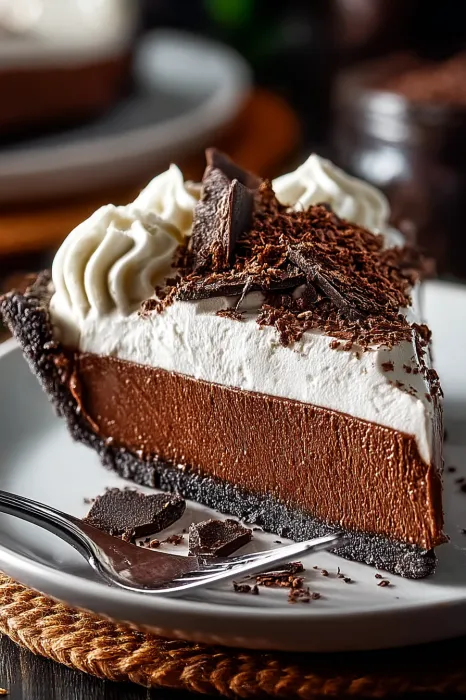
This luxurious French silk pie delivers the perfect balance of rich chocolate flavor and silky smooth texture, nestled in a crunchy Oreo crust that will transport you to dessert heaven with every bite. The contrast between the crisp cookie base and cloud-like filling creates an irresistible texture combination that chocolate lovers will crave again and again.
I first made this silky chocolate dream for my sister's birthday celebration, and the moment everyone took their first bite, the table fell silent before erupting into declarations that this was the best chocolate pie they had ever tasted. Since then, it has become my signature dessert for any gathering where I want to truly impress.
Ingredients
- Oreo cookies: The cream filling adds extra richness to the crust
- Bittersweet chocolate: Provides the deep chocolate flavor foundation
- Room temperature eggs: Essential for proper emulsification and texture
- Unsalted butter: Gives the filling its signature velvety mouthfeel
- Heavy cream: Creates the airy, silky texture that defines French silk
- Vanilla extract: Enhances the chocolate flavor with subtle warmth
- Granulated sugar: Balances the bitterness of the chocolate perfectly
Step-by-Step Instructions
- Prepare the Crust:
- Begin by preheating your oven to 350°F and greasing your pie dish. The Oreo crust is the foundation of this dessert, so take your time combining the crushed cookies with melted butter until every crumb is moistened. Press the mixture firmly and evenly across the bottom and up the sides of your pie dish, using the bottom of a measuring cup to create a smooth, compact surface. The 8-minute bake time is just enough to set the crust without burning it.
- Whip the Cream:
- Using a chilled bowl will help your cream whip faster and hold its structure better. Start on low speed and gradually increase to medium-high until you achieve stiff peaks that stand up straight when you lift the beaters. Be careful not to overwhip, as the cream can quickly turn grainy and begin to separate. The whipped cream provides the signature lightness to this otherwise rich dessert.
- Melt the Chocolate:
- Chopping the chocolate into small, uniform pieces ensures it will melt evenly without scorching. If using the double boiler method, make sure the water doesnt touch the bottom of your bowl and keep the heat gentle. When melting in the microwave, patience is key. Short bursts of heating followed by thorough stirring prevents burning. The chocolate should be completely smooth and slightly cooled before incorporating with other ingredients.
- Prepare the Egg Mixture:
- This step requires attention and care as youre essentially making a cooked custard base. Whisking constantly while heating prevents the eggs from scrambling. The mixture should reach about 160°F to ensure food safety, but if you dont have a thermometer, test by rubbing a bit between your fingers. It should feel warm but not hot. The subsequent beating creates volume and stability in your filling.
- Incorporate Butter and Chocolate:
- Adding the butter gradually allows it to emulsify properly into the egg mixture. Each piece should be fully incorporated before adding the next. When folding in the chocolate, use a gentle hand to maintain the air youve incorporated. The mixture will darken and become glossy as the chocolate is fully integrated.
- Fold in Whipped Cream:
- This is the moment where your filling transforms from dense to silky. Use a large rubber spatula and a gentle folding motion, cutting through the center and sweeping around the edges of the bowl. Continue until no white streaks remain, but be careful not to deflate the mixture.
- Chill to Perfection:
- Pouring the filling into a completely cooled crust prevents soggy bottom issues. Use an offset spatula to create a beautifully smooth top surface. The minimum 2-hour chill time is essential for the filling to set properly, but overnight chilling will develop even more flavor complexity.
 Pin it
The chocolate you choose will dramatically impact the final flavor profile. I once splurged on a high-end 70% cacao chocolate from a local chocolatier, and the difference was remarkable. The flavor notes were more complex, with subtle hints of cherry and vanilla that simply dont come through with standard baking chocolate. This is one recipe where investing in quality chocolate truly elevates the entire dessert.
Perfect Serving Suggestions
French silk pie truly shines when served with contrasting elements. A dollop of barely sweetened whipped cream adds a cloud-like lightness that balances the richness of the filling. For texture contrast, sprinkle some chocolate curls or shavings over the top, which also signals the chocolate decadence awaiting inside. For a special touch, pair each slice with fresh raspberries or a small scoop of vanilla bean ice cream. The slight acidity of the berries or the creamy coldness of the ice cream creates a perfect counterpoint to the intense chocolate experience.
 Pin it
Troubleshooting Common Issues
If your filling seems too loose after chilling, you may have undercooked the egg mixture or not beaten it long enough to create proper structure. The filling should coat the back of a spoon and leave a clear path when you run your finger through it before adding the butter. Another common issue is grainy texture, which usually happens when the chocolate cools too much before being incorporated or when the butter is too cold. Always make sure your ingredients are at the proper temperature before beginning. If your crust crumbles when serving, try chilling the assembled pie for 30 minutes before attempting to slice it, and always use a sharp knife wiped clean between cuts.
The History Behind French Silk Pie
Despite its name, French silk pie is actually an American creation that gained popularity in the 1950s. The "French" in the name refers to the silky, mousse-like texture rather than its country of origin. Betty Cooper created the original recipe for the Pillsbury Bake-Off contest in 1951, where it placed second. The contest version used raw eggs, but modern adaptations like this one gently cook the eggs for safety while maintaining that signature texture. Over the decades, French silk pie has become a staple on restaurant dessert menus across America, beloved for its perfect balance of richness and airiness that satisfies chocolate cravings in a way few other desserts can.
Frequently Asked Questions
- → Can I use a different crust instead of an Oreo crust?
Yes, you can substitute the Oreo crust with a traditional pastry crust or a graham cracker crust for a different flavor and texture.
- → How do I ensure the filling sets properly?
Chill the pie in the refrigerator for at least 2 hours to allow the chocolate filling to set to the right consistency.
- → Can this pie be made ahead of time?
Yes, you can make the pie 1-2 days in advance and store it in the refrigerator until ready to serve. Garnish just before serving.
- → What type of chocolate works best for this pie?
Bittersweet chocolate with a cocoa content of around 60-70% is ideal for a rich, smooth flavor.
- → How should I store leftovers?
Store leftovers in an airtight container in the refrigerator for up to 3 days. You can also freeze the pie for up to 2 months.
- → Can I make this pie without eggs?
This particular recipe relies on eggs for its texture and structure. For an egg-free version, consider searching for alternative recipes tailored to specific dietary needs.