
 Pin it
These Easter cookie bars are the perfect treat that combines the nostalgic comfort of a chocolate chip cookie with the festive charm of Easter candy. I've been making these for my family gatherings every spring, and they're always the first dessert to disappear from the table.
I originally created these bars when I needed a last minute dessert for an Easter brunch. The combination of buttery cookie base with those candy coated chocolate eggs was such a hit that it's now become our official spring tradition.
Ingredients
- Melted unsalted butter: provides richness and that classic cookie flavor
- White sugar: helps create those slightly crisp edges everyone loves
- Brown sugar: brings moisture and deep caramel notes to the bars
- All purpose flour: measured and leveled for the perfect texture
- Baking soda: helps the bars rise just enough without becoming cakey
- Kosher salt: balances the sweetness and enhances all the flavors
- Vanilla essence: adds aromatic warmth to the cookie base
- Large egg plus an extra yolk: creates that perfect chewy texture
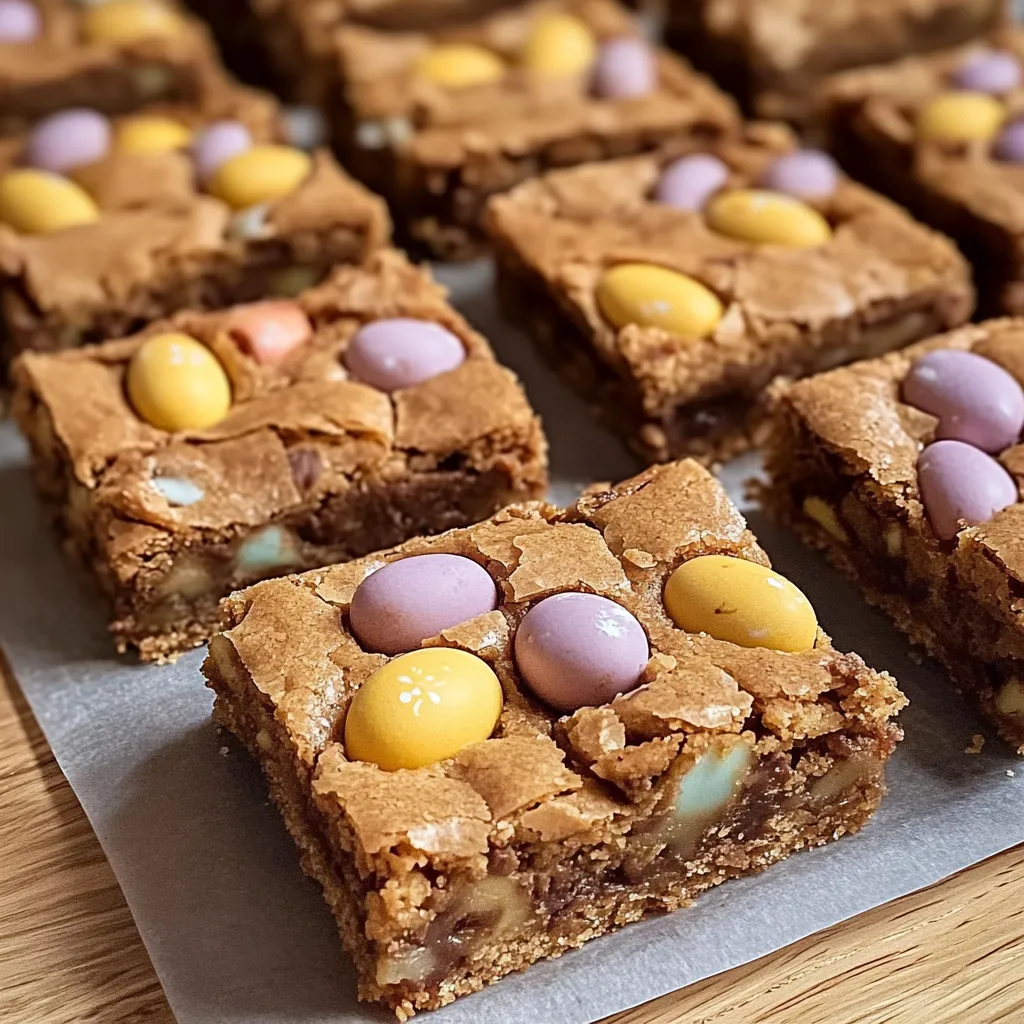
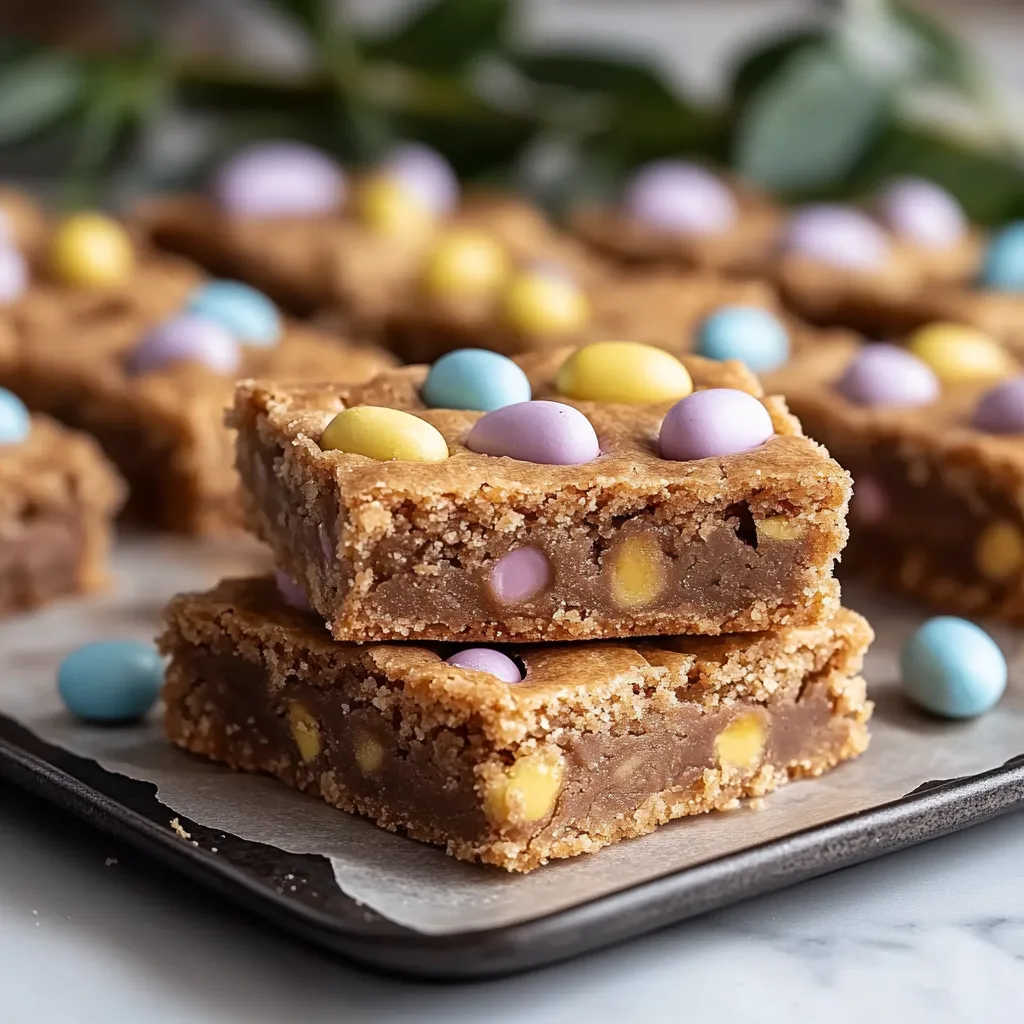
- Cadbury mini eggs: bring festive color and chocolate flavor in every bite
- Optional flaky sea salt: creates the perfect sweet and salty contrast
Step-by-Step Instructions
- Prepare Your Pan:
- Preheat your oven to 350°F and line an 8×8 inch baking pan with parchment paper, leaving some overhang on the sides for easy removal later. The parchment prevents sticking and makes cleanup a breeze.
- Mix Wet Ingredients:
- In a large bowl, combine the melted butter with white and brown sugars, whisking until the mixture looks slightly lighter in color and the sugars have mostly dissolved. This takes about 1 minute of vigorous whisking and creates the foundation for that perfect chewy texture.
- Add Eggs and Vanilla:
- Add the egg, egg yolk, and vanilla to your butter mixture. Whisk until fully incorporated and the mixture looks smooth and slightly thickened. The extra egg yolk is the secret to achieving that soft, gooey center.
- Incorporate Dry Ingredients:
- Add the flour, baking soda, and kosher salt to your wet ingredients. Fold gently with a spatula just until no dry streaks remain. Overmixing at this stage will develop too much gluten and result in tough cookie bars.
- Add The Candy:
- Gently fold in your Cadbury mini eggs, using half whole and half chopped. The chopped pieces disperse throughout the dough while the whole ones create beautiful pops of color and chocolate flavor when you bite into them.
- Press Into Pan:
- Transfer the cookie dough to your prepared pan and press it into an even layer using slightly dampened hands or the back of a measuring cup. Press additional mini eggs into the top of the dough for a festive appearance.
- Bake To Perfection:
- Bake for 23 to 25 minutes until the edges are golden brown but the center still looks slightly underdone. The bars will continue cooking from residual heat after removal from the oven.
- Cool And Cut:
- Allow the cookie bars to cool completely in the pan on a wire rack before lifting out using the parchment paper overhang. Cut into squares once fully cooled for clean slices.
 Pin it
My absolute favorite part about these bars is watching everyone's faces light up when they bite into a piece and discover the colorful Cadbury eggs. My niece once declared these were "better than the Easter Bunny himself" which might be the highest compliment a dessert can receive.
Why Cadbury Mini Eggs Work So Well
Cadbury mini eggs have a unique texture that makes them perfect for baking. Their candy shell maintains its crunch even after baking, creating a delightful contrast against the soft cookie base. The chocolate inside melts just enough to create pockets of chocolatey goodness throughout the bars. I've tried other Easter candies, but nothing quite compares to the way these eggs hold their shape and color while baking.
Customization Options
These cookie bars are incredibly versatile and can be adapted to your preferences. Try adding white chocolate chips for extra sweetness, or fold in some toasted coconut for tropical flavor. For a nutty twist, add a handful of chopped pecans or walnuts to the batter. You can even switch up the Cadbury eggs for M&Ms to make these suitable for any time of year. My personal favorite variation includes a swirl of Nutella on top before baking a decadent twist that's worth trying at least once.
Serving Suggestions
These cookie bars are delightful on their own, but try serving them slightly warmed with a scoop of vanilla ice cream for a truly indulgent dessert. They also pair wonderfully with a glass of cold milk or a cup of coffee. For an Easter brunch spread, cut them into smaller bite sized pieces and arrange them on a platter alongside fresh berries and whipped cream. These bars make excellent gifts too wrap individual pieces in wax paper and place in decorative tins for a homemade treat friends and family will appreciate.
 Pin it
Frequently Asked Questions
- → How do I store these cookie bars?
Keep them in an airtight container at room temperature with a slice of bread to maintain their softness for up to 5 days.
- → Can I freeze the cookie bars?
Yes, freeze them in a freezer-safe container with parchment paper layers for up to 3 months. Thaw at room temperature before serving.
- → How far in advance can I prepare the dough?
You can make the dough up to 24 hours in advance. Store it in the fridge and let it sit at room temperature for 20 minutes before baking.
- → Any tips for keeping the texture perfect?
Adding a slice of bread to the container helps retain moisture, keeping the bars soft. Avoid over-baking for the chewy consistency.
- → Can I customize the toppings?
Absolutely! Use other candy or chocolate pieces instead of Cadbury mini eggs, or sprinkle flaky sea salt for added flavor.