
 Pin it
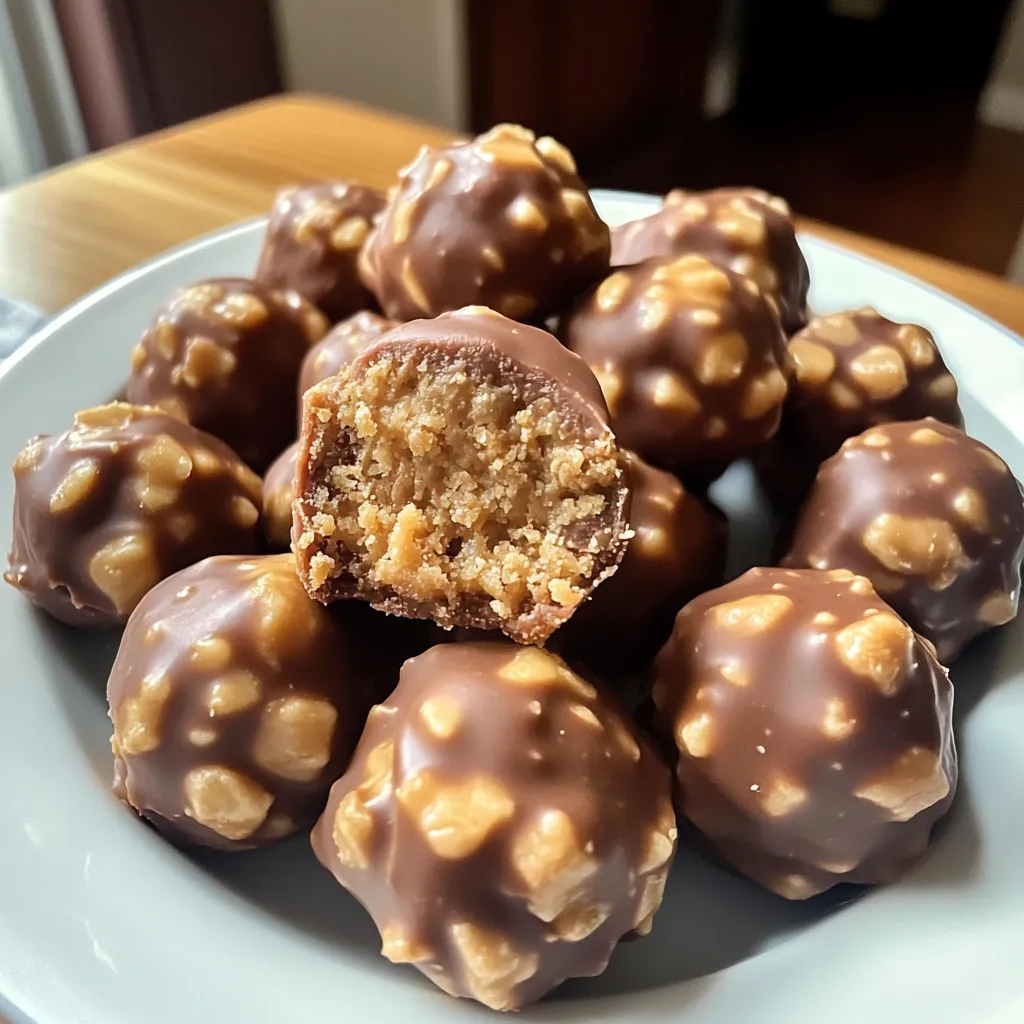
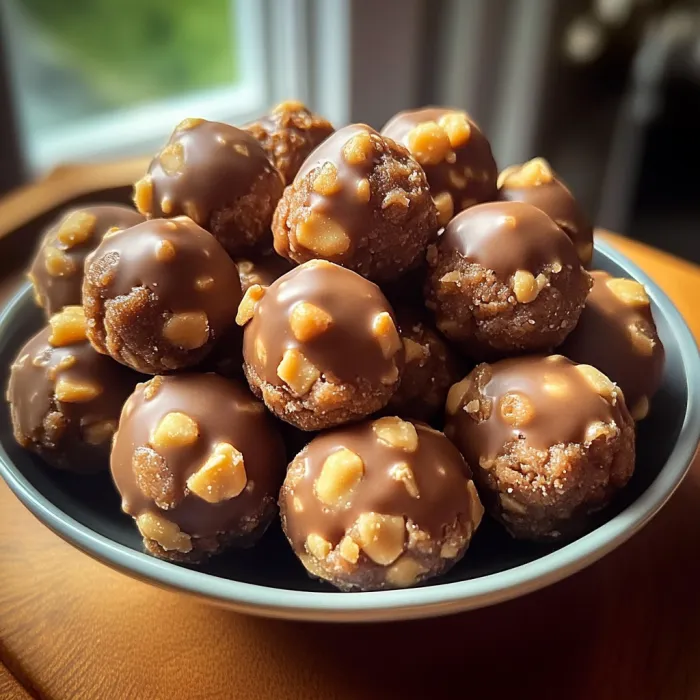
This butterfinger balls recipe transforms simple ingredients into irresistible bite-sized treats that have become my go-to dessert for gatherings year-round. The perfect balance of creamy peanut butter filling studded with crunchy Butterfinger pieces and enrobed in smooth chocolate creates an unforgettable flavor experience that both kids and adults adore.
I first made these butterfinger balls for a last minute holiday party when I needed something quick yet impressive. They disappeared within minutes and I've been getting requests for "those amazing peanut butter chocolate things" ever since.
Ingredients
- Peanut butter: Provides the creamy base choose classic brands like Jif or Skippy for best results
- Butter: Adds richness and helps create the perfect texture use softened not melted
- Powdered sugar: Sweetens and helps bind everything together sift if lumpy
- Graham cracker crumbs: Add structure and a subtle honey flavor use store bought or pulse whole crackers
- Butterfinger bars: Bring that iconic candy flavor crush them into small but not powdery pieces
- Vanilla extract: Enhances all the flavors use pure not imitation for best taste
- Chocolate bark or chips for coating: Melts smoothly and sets with a satisfying snap
- Optional garnishes: Add visual appeal and flavor contrast choose based on your occasion
Step-by-Step Instructions
- Prepare the Dough:
- Combine peanut butter and softened butter in a mixing bowl. Using an electric mixer beat on medium speed for about 2 minutes until completely smooth and creamy. This creates the luxurious base for our butterfinger balls so take your time to ensure they're well incorporated.
- Add Aromatic Notes:
- Pour in the teaspoon of vanilla extract and mix for another 30 seconds until fully blended. The vanilla adds a subtle depth that complements both the peanut butter and chocolate flavors beautifully.
- Sweeten the Deal:
- Add powdered sugar gradually about 1/4 cup at a time while mixing on low speed. Scrape down the sides of the bowl between additions to ensure even distribution. The mixture will become thicker and start to pull away from the sides of the bowl when properly mixed.
- Crunch Time:
- Gently fold in the graham cracker crumbs and crushed Butterfinger pieces using a spatula. Mix just until combined to maintain the textural contrast. The mixture should hold together when pressed but still have visible Butterfinger pieces throughout.
- Shape 'em Up:
- Line a large cookie sheet with parchment paper. Using a cookie scoop or tablespoon measure scoop 1 to 1½ tablespoons of dough and roll between your palms to form perfect spheres. Place them on the parchment about an inch apart. For uniform balls consider weighing each portion.
- Chilling Phase:
- Place the entire cookie sheet in the freezer for about 30 minutes until the balls are completely firm. This crucial step ensures they maintain their shape when dipped in warm chocolate and helps the chocolate set more quickly.
- Chocolate Symphony:
- Once balls are thoroughly chilled place chocolate in a microwave safe bowl. Heat in 30 second intervals at 50% power stirring thoroughly between each heating. Stop when most but not all chocolate is melted and stir until completely smooth. The residual heat will melt remaining pieces preventing scorching.
- Coat and Decorate:
- Using two forks dip each chilled ball into the melted chocolate allowing excess to drip off. Return to parchment paper and immediately add toppings before chocolate sets. Work with 4 to 5 balls at a time keeping the remainder chilled.
- Finishing Touches:
- Sprinkle your choice of toppings onto the still wet chocolate. Extra crushed Butterfinger pieces create a visual cue to the flavors inside while sea salt adds a sophisticated flavor contrast that brings out the sweetness.
- The Grand Finale:
- Allow chocolate to completely set at room temperature about 1 hour or speed up the process with 15 minutes in the refrigerator. The finished balls should have a firm chocolate shell with a slight sheen.
 Pin it
Butterfingers have always been my husband's favorite candy bar which inspired me to create these truffle like treats for his birthday several years ago. Now they've become our family's traditional dessert for special celebrations with everyone pitching in to roll and dip them.
Storage Success
These butterfinger balls maintain their best flavor and texture when stored in an airtight container in the refrigerator for up to 7 days. For longer storage freeze them on a baking sheet until solid then transfer to a freezer safe container with parchment paper between layers. When ready to enjoy thaw in the refrigerator overnight or at room temperature for about 30 minutes.
 Pin it
Clever Substitutions
While the classic recipe is hard to beat you can create variations to suit different tastes or dietary needs. Try almond butter for a nuttier flavor or cookie butter for a spiced twist. Allergic to peanuts? Sunflower seed butter works beautifully while maintaining a similar texture. For the coating dark chocolate or white chocolate both work wonderfully creating entirely different but equally delicious treats.
Presentation Perfection
Elevate these simple treats for gifting or special occasions by placing each ball in a mini cupcake liner and arranging in a decorative box tied with ribbon. For holiday entertaining create a dessert board featuring these butterfinger balls alongside fresh berries nuts and complementary cookies. The contrast of textures and flavors makes for an impressive spread that requires minimal effort.
Frequently Asked Questions
- → What type of peanut butter works best?
Choose conventional brands like Jif or Skippy as natural peanut butter can be too oily.
- → Can I use chocolate chips instead of chocolate bark?
Yes, you can use chocolate chips, but the texture may be smoother with chocolate bark. A combination also works well.
- → How should these be stored?
Store Butterfinger Bliss Balls in an airtight container in the refrigerator for up to a week.
- → Can I melt the chocolate without a microwave?
Absolutely! Use a double boiler to melt the chocolate over low or medium-low heat.
- → What are some optional toppings?
Consider crushed Butterfinger bars, festive sprinkles, or coarse sea salt for an extra touch.